How Seniors Can Monitor Blood Sugar at Home: A Complete, Practical Guide
This post contains affiliate links. As an Amazon Associate, I earn from qualifying purchases at no extra cost to you.
Free resources — no credit card required for trial
🎧 Listen to health & wellness audiobooks free for 30 days
Start 30-Day Free Trial →
🛒 Recommended Products
As an Amazon Associate we earn from qualifying purchases at no extra cost to you.
TheraBand First Step to Active Health Kit — Senior Exercise Program for Balance and Fall P
$19.99
EZ Off Jar Opener for Seniors — Under Cabinet Jar Opener for Weak Hands and Arthritis
$9.99
Omron 5 Series Upper Arm Blood Pressure Monitor — 2-User 100-Reading Memory Wide-Range Cuf
$44.99
OMRON 7 Series Wireless Wrist Blood Pressure Monitor — Clinically Validated with Connect A
$69.99
Vitality 4 Life Senior Resistance Band with Instruction Guide — Specifically for Elderly F
$16.99
📚 Read unlimited health books free for 30 days
Try Kindle Unlimited Free →
Living with diabetes doesn’t have to feel overwhelming — especially when you have the right tools and knowledge to stay on top of your health every single day. For seniors, learning how to monitor blood sugar at home is one of the most empowering steps you can take toward independence, safety, and peace of mind. Whether you’ve been managing diabetes for years or you’re just getting started with home testing, this guide walks you through everything you need to know — in clear, friendly language designed to make the process feel manageable, not intimidating.
Why Monitoring Blood Sugar at Home Matters for Seniors
When you check your blood sugar regularly at home, you get a real-time picture of how your body is responding to the things you do every day — what you eat, how much you move, how well you sleep, and how your medications are working. That information is genuinely valuable. It helps you catch problems before they become serious, and it gives your doctor the accurate data they need to fine-tune your treatment plan.
For older adults especially, the stakes are a little higher. Seniors can sometimes have a harder time recognising the warning signs of dangerously low blood sugar (hypoglycemia) — things like shakiness, confusion, and dizziness — because those symptoms can overlap with other age-related changes. Regular home monitoring creates a safety net. When you know your numbers, you can act quickly and confidently instead of guessing.
There’s also the question of independence. Managing your diabetes well at home means fewer emergency situations, fewer hospital visits, and more freedom to live life on your own terms. That’s a goal worth working toward, and home blood sugar monitoring is one of the most direct ways to get there.
Understanding Your Options: Types of Blood Sugar Monitors
The good news is that technology has made blood sugar monitoring easier and more accurate than ever before. There are two main types of devices available to you, and understanding the difference can help you choose the one that fits your lifestyle best.
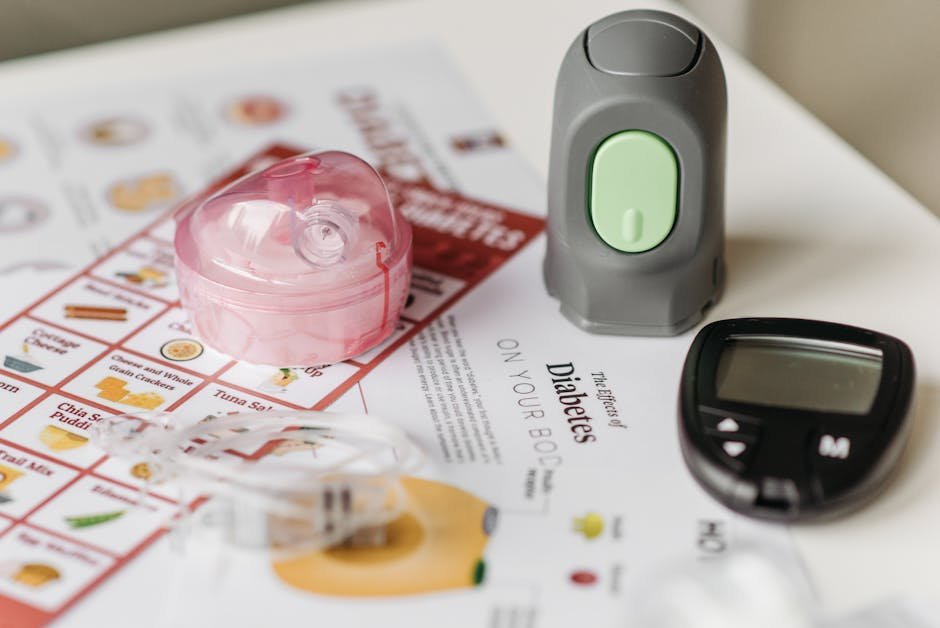
Traditional finger-stick meters are small, handheld devices that measure your blood sugar from a tiny drop of blood — usually taken from the side of your fingertip. They are affordable, reliable, and widely available. Once you get the hang of the process, the whole test takes just a few seconds. If you’re new to home monitoring, a finger-stick meter is a great place to start.
Continuous Glucose Monitors (CGMs) are a newer option that many seniors find especially helpful. A small sensor is worn on your body — typically on your arm or abdomen — and it measures your glucose levels every few minutes throughout the day and night. Many CGMs connect to a smartphone or small receiver and can even send you alerts if your blood sugar goes too high or too low. This is particularly useful if you struggle to remember to test regularly, or if your blood sugar levels tend to fluctuate overnight. CGMs usually require a prescription, so talk with your doctor or diabetes educator about whether one could be right for you.
Choosing the Right Blood Sugar Meter for Seniors
Not all glucose meters are created equal, and when it comes to monitoring blood sugar at home as a senior, the right device can make a world of difference in how easy and consistent your testing routine becomes. There are a few key features to look out for when you’re shopping around.
Look for a meter with a large, bright display — numbers should be easy to read at a glance, ideally with backlighting for use in dim rooms. Simple buttons and a clear, straightforward menu make the device much easier to use day to day. A meter that stores many past readings and allows you to download results to a phone or computer is also a huge plus, since it helps you and your doctor spot patterns over time.
If arthritis or sensitive fingertips are a concern — and for many older adults, they are — pay close attention to the lancing device that comes with the meter. Look for one that’s comfortable to grip, has adjustable depth settings so you can find the gentlest effective setting, and is easy to load and use. A quick test time (five seconds or less) and a small required blood sample can also reduce discomfort considerably. If you’re unsure which meter to choose, your pharmacist is a wonderfully underused resource — they can point you toward models that have worked well for others in your situation.
Step-by-Step: How to Test Your Blood Sugar at Home
Once you have your meter and supplies, the actual testing process is straightforward. Here’s a clear, easy-to-follow guide you can refer to whenever you need a refresher.
Start by washing your hands with warm soap and water for about 20 seconds, then dry them thoroughly. Clean hands help prevent false readings — a small but important step. Next, gather your supplies: your meter, a test strip, and your lancing device. Insert a fresh test strip into the meter and wait for the display to signal that it’s ready.
When you’re ready to prick your finger, the side of the fingertip tends to be less painful than the pad. Use a gentle, firm motion, and if your fingers are stiff or sore, try adjusting the depth setting on your lancing device. Touch the test strip to the small drop of blood — the strip will draw it in automatically. Don’t smear or press too hard; a small drop is all you need. In just a few seconds, your result will appear on the display.
Write down your reading straight away — the number, the date, the time, and any relevant notes like what you ate recently, any activity you did, or how you’re feeling. This log becomes enormously useful when you review your patterns or share information with your healthcare team. Finally, safely dispose of your lancet in a sharps container, store your meter and strips in a cool, dry place, and give your hands another wash if needed. Never share lancets with anyone else — this is an important safety rule.
Understanding Your Numbers and Tracking Trends
Knowing your blood sugar number is one thing — understanding what it means is another. Your doctor will set personalised target ranges for you, but as a general reference point, many adults with diabetes aim for roughly 80–130 mg/dL before a meal, less than 180 mg/dL about two hours after eating, and somewhere around 100–140 mg/dL at bedtime. Your own targets may differ, so always follow the guidance your healthcare team has given you.
One of the most valuable habits you can build is looking at your results as a collection of information rather than as isolated numbers. Are your readings consistently higher after a particular type of meal? Do lows tend to happen overnight? Do your numbers climb on certain days of the week? These patterns are incredibly useful clues. When you share a weekly or monthly summary with your doctor, you give them a much richer picture of how your diabetes is behaving — and that leads to better, more tailored care for you.
If you have a CGM, your device will show you trend arrows and alerts rather than just a single number. Take the time to read through your device’s manual and understand what each symbol means. It’s worth asking your diabetes educator to walk you through it as well — they’re there to help.
Practical Tips for Making Home Monitoring Easier and Safer
Building a reliable home monitoring routine doesn’t have to be complicated. A few simple habits and the right setup can make all the difference, especially on busy or tiring days when it’s tempting to skip a check.
- Create a dedicated diabetes care kit. Keep your meter, extra test strips, lancets, alcohol wipes, a small notebook, and a pen all together in one easy-to-reach spot. Knowing exactly where everything is removes friction from the process.
- Set regular reminders. Use your phone’s alarm, a simple clock timer, or even sticky notes to prompt yourself to test at consistent times each day. Routine makes monitoring second nature.
- Store your supplies correctly. Keep test strips in their original container, away from heat, humidity, and direct sunlight. Always check expiration dates — expired strips can give inaccurate results.
- Never reuse or share lancets. Lancets should be used once and then safely discarded in a sharps container. Reusing them can cause more pain and increases the risk of infection.
- Involve a trusted person in your routine. Ask a family member or caregiver to learn your testing process so they can help if needed, while you remain in control of your own health decisions.
- Don’t ignore persistent patterns. If your readings are regularly outside your target range, or if you notice symptoms of high or low blood sugar, reach out to your healthcare team rather than waiting and hoping things improve on their own.
- Ask about a CGM if traditional testing is difficult. If arthritis, memory issues, or overnight fluctuations make finger-stick testing challenging, a continuous glucose monitor could be a genuine game-changer for your safety and quality of life.
- Check in with your pharmacist. If you’re struggling with your current meter or finding the process painful or confusing, your pharmacist can recommend alternatives and show you how to use them correctly.
When to Call Your Doctor About Your Blood Sugar Readings
Home monitoring is most powerful when it’s connected to the guidance of your healthcare team. There are certain situations where it’s important to reach out to your doctor or diabetes educator promptly, rather than trying to manage things on your own.
Call your doctor if your readings are consistently outside your target range — particularly if you see several high or low readings in a row. Symptoms to watch for include frequent urination, extreme thirst, fatigue, or fruity-smelling breath (signs of high blood sugar), as well as shaking, sweating, confusion, or dizziness (signs of low blood sugar). If you’re unwell with a fever, vomiting, or diarrhoea, it’s especially important to be in touch with your clinician, as illness can cause blood sugar levels to swing unpredictably.
Also reach out if you’re starting or changing any medications and want guidance on how to adjust your testing routine accordingly, or if your meter seems to be giving erratic or unexpected results. You should never feel like you’re bothering your healthcare team by asking questions — that’s exactly what they’re there for, and your safety is worth the phone call.
The Bottom Line: Monitoring blood sugar at home is one of the most meaningful things a senior with diabetes can do to protect their health and maintain their independence. With the right meter, a simple daily routine, and a good log of your results, you put yourself firmly in the driver’s seat of your own care. You’ll have accurate, real-world information to share with your doctor, the ability to catch problems early, and the confidence that comes from truly knowing your body. You don’t have to navigate this alone — your healthcare team, your pharmacist, and your loved ones are all on your side. Take it one test at a time, and know that every reading you take is a small, meaningful act of self-care.
This is not medical advice. Consult your healthcare provider before starting any new health routine or using any product mentioned here.