How to Test Your Balance at Home: A Practical Guide for Safer, More Confident Senior Mobility
This post contains affiliate links. As an Amazon Associate, I earn from qualifying purchases at no extra cost to you.
Free resources — no credit card required for trial
🎧 Listen to health & wellness audiobooks free for 30 days
Start 30-Day Free Trial →
🛒 Recommended Products
As an Amazon Associate we earn from qualifying purchases at no extra cost to you.
TheraBand First Step to Active Health Kit — Senior Exercise Program for Balance and Fall P
$19.99
EZ Off Jar Opener for Seniors — Under Cabinet Jar Opener for Weak Hands and Arthritis
$9.99
Omron 5 Series Upper Arm Blood Pressure Monitor — 2-User 100-Reading Memory Wide-Range Cuf
$44.99
OMRON 7 Series Wireless Wrist Blood Pressure Monitor — Clinically Validated with Connect A
$69.99
Vitality 4 Life Senior Resistance Band with Instruction Guide — Specifically for Elderly F
$16.99
📚 Read unlimited health books free for 30 days
Try Kindle Unlimited Free →
Have you ever reached for something on a high shelf and felt a moment of uncertainty? Or stood up quickly and found yourself grabbing the nearest surface for reassurance? If so, you’re not alone — and you’re not imagining things. Balance naturally changes as we get older, and learning how to test your balance at home is one of the smartest, most empowering things you can do for your long-term independence and safety. The good news? You don’t need any fancy equipment or a gym membership. Just a sturdy chair, a clear space, and a few minutes of your time can give you genuinely useful insights into how steady you are on your feet right now.
Why Balance Matters More Than Most Seniors Realise
Balance isn’t just about standing on one leg. It’s woven into almost everything you do each day — getting up from a chair, climbing stairs, carrying groceries, even turning around in the kitchen. When your balance is strong, you move through your day with confidence. When it starts to slip, daily tasks can feel a little more daunting, and the risk of a fall creeps up quietly in the background.
As we age, several things shift at once. Our vision changes, the tiny balance-sensing structures in our inner ear become less sensitive, and the muscles in our legs and core — the ones that keep us upright — naturally lose some of their strength and responsiveness. None of this is inevitable doom, though. Awareness is the first step to improvement, and that’s exactly what a simple at-home balance test gives you.
The goal here isn’t to diagnose yourself with a medical condition. These are self-checks — a way to understand where you’re solid and where a bit of extra practice could make a real difference. Think of it like checking your tyre pressure. You’re not a mechanic, but knowing the reading helps you decide whether to keep driving or visit the garage. Same idea here.
Setting Up Safely Before You Test Your Balance at Home
Before you jump into any of the tests, it’s worth taking five minutes to set up your space properly. Safety isn’t just a box to tick — it’s what makes these tests genuinely useful rather than potentially risky. A little preparation goes a long way.
Choose a sturdy chair with firm armrests and non-slip feet — a dining chair or solid office chair works perfectly. Pick a clear, flat area in your home, like a hallway or living room, and remove any rugs, cords, or clutter that could trip you up. A wall, countertop, or another sturdy chair should always be within arm’s reach while you test. And please, wear supportive, non-slip shoes — not loose slippers or bare feet on a smooth floor.
If you have a family member, carer, or friend at home, it’s a wonderful idea to ask them to stay nearby, especially for tests that feel a bit wobbly at first. And if you’ve had a recent fall or injury, feel dizzy or lightheaded today, or have conditions like osteoporosis or severe arthritis, check with your doctor before trying these tests. There’s no rush — your safety always comes first.
Three Simple Balance Tests You Can Try Right Now
These three tests cover the main aspects of everyday balance: single-leg steadiness, narrow-stance stability, and the kind of sit-stand-walk movement that features in real daily life. You only need a timer (your phone works perfectly), a clear space, and your trusty chair.
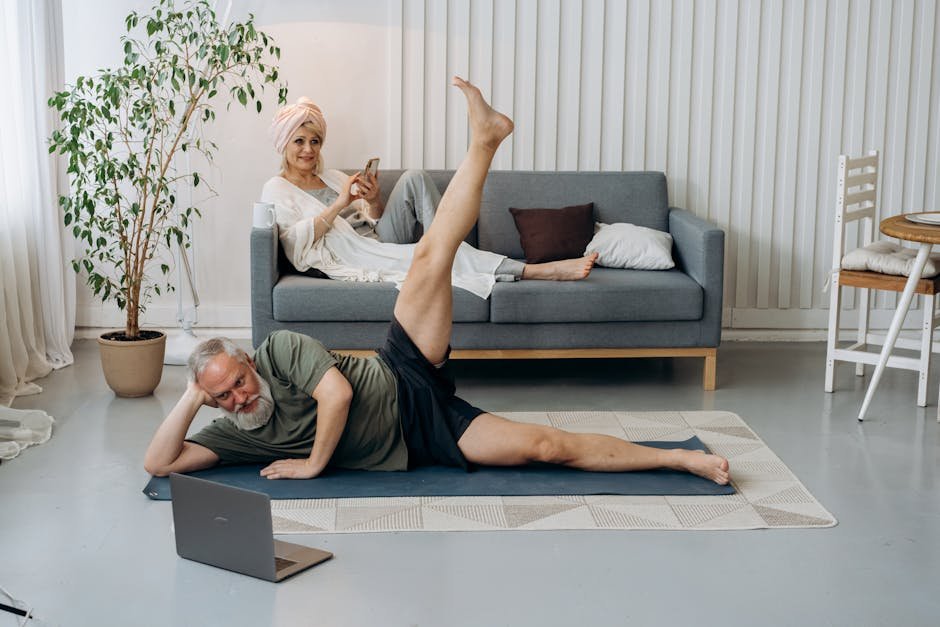
Test 1: The One-Leg Stand. Stand tall near a wall or counter, placing one hand lightly on the surface for support if you need it. Lift one foot just off the floor and try to hold steady for up to 15–20 seconds. Keep your eyes fixed on a point straight ahead — this really helps. Switch to the other leg and repeat. Notice whether one side feels noticeably steadier than the other, and whether you needed the wall for most of the time or just occasionally. If you feel wobbly at any point, stop and rest. No pushing through dizziness.
Test 2: Tandem Stance (Heel-to-Toe). Still near your wall or chair, place the heel of one foot directly in front of the toes of your other foot — like you’re standing on a tightrope. Hold that position with eyes open for 10–15 seconds, then switch feet. This tests your ankle stability and your ability to balance on a narrow base of support, which is exactly what happens when you navigate a tight space or uneven ground.
Test 3: Timed Up and Go (TUG). This is the most practical of the three, because it mirrors real movement. Sit toward the front of your chair with your hands on your thighs. Start your timer, stand up (without pushing off with your arms if you can manage it), walk at a comfortable pace to a point about 10 feet (3 metres) away, turn around, walk back, and sit down. Stop the timer when you’re seated. Note your time and how you felt during the task — steady, a little wobbly, or confident? You can repeat this test weekly to track your progress over time.
How to Make Sense of Your Results
Once you’ve worked through the tests, take a moment to reflect on how things went. Remember, these aren’t pass-or-fail exams — they’re snapshots of where you are right now, and they’re most useful when you track them over time.
If all three tests felt fairly easy and you didn’t need much support, that’s a genuinely positive sign. Your balance is in good shape for your age. Keep doing what you’re doing and consider adding some balance-focused movement to your week to stay sharp.
If you found some tests tricky — needed the wall more than expected, wobbled on one side, or felt a little unsteady during the TUG — that’s actually useful, actionable information. It’s also very common. This is your cue to weave some regular balance practice into your week. Even small, consistent improvements add up significantly over time, and you’ll likely notice the difference within a few weeks.
If you struggled to complete the tests, or found yourself frequently unsteady, please don’t be discouraged — but do consider booking an appointment with your GP, a physiotherapist, or a falls-prevention specialist. They can carry out a full balance assessment and design a safe, personalised programme just for you. Getting professional input at this stage is a sign of wisdom, not weakness.
What You Can Do Every Day to Improve Your Balance
Testing your balance at home is a brilliant starting point, but the real magic happens in consistent, gentle daily practice. Here are practical steps you can take right away:
- Make your home safer: Add grab bars in the bathroom, ensure every room is well-lit, swap loose rugs for non-slip mats, and keep a sturdy chair nearby in rooms where you spend time standing.
- Try balance-friendly activities: Chair yoga, tai chi, and gentle balance-focused exercise classes are excellent options. Many are available online or through local community centres, and some are specifically designed for older adults.
- Strengthen the muscles that matter: Seated leg lifts, sit-to-stand exercises, and gentle squats all build the leg and hip strength that underpins good balance. Even 10 minutes a day makes a difference.
- Practice regularly, not occasionally: Aim for balance-focused practice two or three times a week, alongside daily movement like walking, light gardening, or climbing stairs. Short, regular sessions are far more effective than occasional long ones.
- Choose your footwear wisely: Wear supportive, well-fitting shoes with good grip. Avoid worn-out soles, high heels, or loose slippers — especially on hard floors.
- Stay hydrated and review your medications: Dehydration can make dizziness worse, and some common medications have balance-affecting side effects. Talk to your pharmacist or doctor if you suspect your medicines might be contributing to unsteadiness.
- Keep a simple progress log: Jot down the date, which tests you did, how long you held each stance, and your TUG time. Watching those numbers improve is genuinely motivating.
A Gentle Starter Routine You Can Begin Today
If you’d like something concrete to get you moving straight away, here’s a simple routine that takes around 10–15 minutes and requires nothing more than your own body, a chair, and a wall. It’s designed to be gentle enough for beginners but effective enough to notice real progress over time.
Start with a brief warm-up: march gently in place for one to two minutes, swinging your arms naturally. This gets your circulation going and warms up your joints. Next, try sit-to-stand with a balance hold — sit, rise fully, hold the standing position for five to ten seconds, then sit back down. Aim for eight to twelve repetitions. Follow this with standing marches near a wall: lift each knee alternately for about a minute, keeping your hands lightly on the wall if needed. Then move into a short heel-to-toe walk along a hallway, eight to ten steps with support from the wall if you’d like it. Finish with your one-leg stand practice — three rounds per leg, holding up to fifteen seconds with support as needed. Once a week, add in your TUG test to monitor how your mobility is changing.
This routine isn’t meant to be exhausting — it’s meant to be something you actually look forward to. Pair it with a cup of tea afterwards, some gentle music during, or a friend on the phone to encourage you. Whatever makes it feel like a treat rather than a chore is exactly right.
The Bottom Line: Learning how to test your balance at home is one of the most practical, proactive things you can do for your health and independence as you get older. These three simple tests — the one-leg stand, tandem stance, and Timed Up and Go — take just minutes to complete and give you genuinely valuable information about where you’re strong and where a bit of focused practice could help. Pair your testing with daily movement, sensible footwear, a safer home environment, and the occasional check-in with a healthcare professional, and you’re building a real foundation for staying steady, confident, and active for years to come. You’ve already taken the first step just by reading this — now let’s keep that momentum going.
This is not medical advice. Consult your healthcare provider before starting any new health routine or using any product mentioned here.